Task Card Tutorial Series: Making Task Card Sized Covers & Answer Keys

Two posts two days in a row, and this post is a two-for-one special!  These two tips are two of my favorites, but they're so similar that they needed to share a post.  Sharing is caring, right?  Except when it comes to germs, even though my students feel like they should share those with me too.

PS if ever there was an over usage of the homophone "two-to-too" I gotcha covered ^


I will usually hole-punch the answer key and keep it with the task card set.  I love this because I can pull the set out to use again and again and I don't have to search for the file on my computer or the answer key in my "master" binder.  And I'm all for saving time folks.  


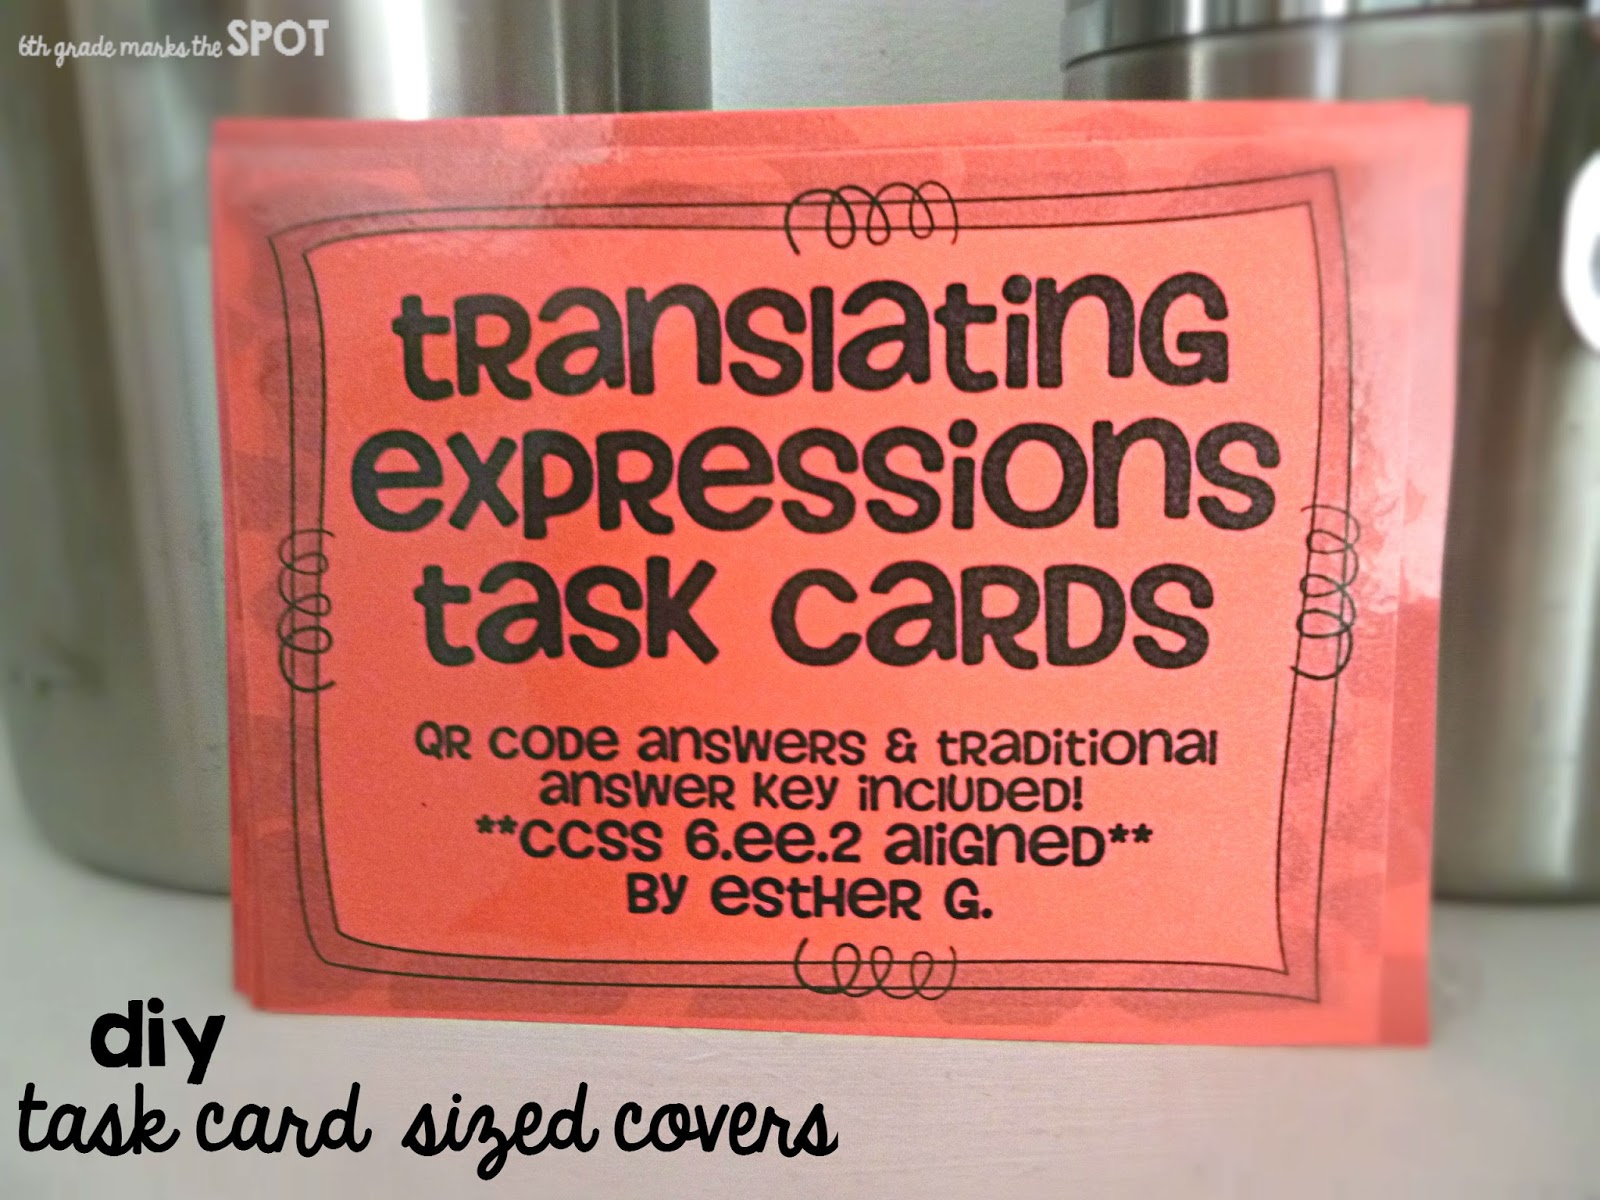
A lot of times teachers will ask TpT sellers to make/include a cover that is the same size as the rest of the task cards.  With this trick, you simply manipulate your print settings to do the job for you!  I'm using Adobe Reader here, but the trick works with Preview on a Mac as well.  (Adobe tends to give me fewer printing issues with TpT PDFs).  This tutorial assumes that the file you have has 4 task cards on each page in landscape orientation.


First, you'll want to identify which pages you'll want to print as a reduced or 1/4-sized image.  My cover page is on page 1, and my answer key is on page 13, so I will be printing these two pages. You can find this information in a box that looks like this along the top ribbon of your screen:


Second, open your printing options, usually by going to File>Print or by pressing CTRL+P (or CMD+P if you're using a Mac).

Third, you want to tell the computer/printer which pages you want to print.  Since I only want to shrink my cover and answer key pages, I'm telling it to print pages 1 and 13 (1, 13).


Fourth, make these selections.  I want 4 pages per sheet because my task cards are 4 per sheet.  You can change this if you're making mini-sets of task cards, which you'll see in my next post :)  I want my paper to print in Landscape orientation.  Again, depending on the format of the task cards you purchased, this may change.  Check the preview before printing :)
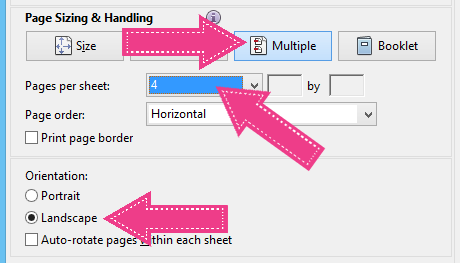


Fifth and lastly, check the little preview box to make sure it's going to look like you want!   If you're printing lots of pages, you may need to toggle on those arrows under the preview to see how they look on the next pages.  When you're satisfied, go ahead and press print!  


This is a GREAT way to keep your task cards more organized because the cover is identical to the one provided in the file.  Most sellers have the CCSS standard printed on it which makes your life all the easier. 

Past Task Card Series Posts: 


Task Card Tutorial Series: Organizing All of Your Cards & Hot Temperatures

You know how lots of cool bloggers have those "currently" posts?  Well, currently I am seeking refuge in my basement from the 89 degree temperature in the upstairs of our house.  89 DEGREES PEOPLE!  Our A/C is dead, and Fix-It Felix isn't coming until tomorrow.  This guy has no idea how excited I will be to see his work truck arrive.  Unfortunately, this is not the hottest I've been in the past week.  Growing up, every time my family took a big old family trip, there was always a hiccup with the car.  Part of it was Murphy's Law, and part of it was probably just the fact that the cars we had couldn't handle the heat.  Well, on our way back from San Diego this weekend on the I-15, our car power went out...like while we were going 70 mph.  We made it off the freeway next to another car that was having some troubles.  It was a given since it was 116 degrees.  That is Satan weather.  If you live in this type of weather often, props to you.  I would die.  After I cooked an egg on the asphalt.  :)  

Let's get down to business and talk about organizing the many, many sets of task cards you have lurking in your classroom!  There are lots of great resources out there, Mary at Task Card Corner has some fun ones HERE, but I always spend too much money on books for my classroom that I have to cut back somewhere else.  (aka I don't want too many Target trips showing up on our bank account.....)  


You'll need some of these nifty plastic "shoe box" containers.  They sell them at the dollar store, but I have a complex about my plastic containers matching, and the dollar store doesn't always carry the exact same brand and design.  So, I buy these guys from Walmart here.  They sell them individually at the store, and they are a dollar as well.  Win!  They sometimes carry blue and pink, but that would interfere with my plastic container complex.  After organizing each set individually, start loading them in!


I like to have different boxes for different subjects, but depending on how many task cards you have, that might not be the most efficient option for you.  If you don't have enough task cards to fill multiple boxes, I suggest making tabs to separate the subjects/concepts to save yourself from having to flip through each set every time you need to take them out. Ain't nobody got time for that.  


Now with the lid on, you can easily see what's inside, but it's all organized and VERY accessible when you're in a hurry!  If you don't like to see what's inside, you could line the sides with fun contact paper or even some scrapbook paper!  Now that that idea just popped into my head, I'm probably going to need to do this.  :)  Stay tuned!

Happy organizing, and here's hoping our A/C gets fixed on the double!

Past task card posts: 

Task Card Tutorial Series

I think I have an unhealthy addiction to task cards.  Sound familiar?  Before I even began selling on TPT, I loved everything about them.  I loved that they got my kids out of their seats, I loved that I could reuse them year after year, I loved that I could make them into a game with a little tweak here and there, and I loved that I had an excuse to buy a personal laminator.  (As a side note, blogger doesn't recognize the word "laminator")  This addiction has left me with task cards galore and over the few years that they've  been super popular, I've learned a lot of fun tips for using, organizing, storing and keeping track of them.  Some have come from my brain, others I probably gleaned from Pinterest here and there, and others came from fellow teachers.  I thought I'd share some of what works for me in a little mini-series to kick off the return of the blog!  Huzzah!


Over the next few weeks I'll be sharing a different tip for a total of 7!  Summer is always my "organize" time of year since I don't have to sacrifice sleep to write a lesson plan at 1 am after working on an organization project.  Buuuut, let's be real, I'm up that late anyway.  


#1 This is my favorite way: a loose binder ring!  I can easily remove it when I'm using them in class with my students, but it's a very easy way to keep those pesky cards from running amok when it's attached!  I often will send a set of task cards to the resource teacher with my students so they can work on them, and I have always received my set in the same condition I sent it.  It's pretty self-explanatory; just punch a hole in each corner (you can use a single punch, but those things hurt my hand so I just use the middle punch on a 3-hole punch!) and slip the ring through.  Go!  Find the loose ones lurking in your desk and give it a try!  


#2 Ye old rubber band.  This is definitely not the snazziest way, but it sure gets the job done at the cheapest price.  I do like that I don't have to punch holes in each card, so I'll often turn to my rubber band collection when I'm in a time crunch.  I always have a few girls throughout the week who come to school early and ask for a job to do, and they'll punch the holes for me.  Man, I love upper grades!  A Rubber band really is a great way to store your cards if you don't like the idea of a hole being in each card.


#3 Binder Clips are another way to organize the cards without punching a hole.  I use these for my mini task card sets a lot because they're already so tiny that punching a hole takes up too much surface area for my liking.  Every teacher I know has about 5 million of these things laying around their junk drawer, so it's likely that you have all of the materials you need! :)


#4 A handy-dandy Ziploc Bag is the final way of storing them!  I only have a few sets of task cards in bags because I favor my binder rings.  I like to use Ziploc bags for task cards if they have other little pieces that go with them - perhaps I used some little game pieces for it, etc.  If you do choose to go this route, I highly recommend getting the freezer bags because they will hold up much longer than the regular sandwich bags.

How do you store your sets of task cards?


Under Construction

Hello!  Chances are, you are new here.  WELCOME!  If you ARE (by some miracle) returning to this forgotten blog, thanks for believing that I would eventually resurrect it!  :)

Over the summer, I'm working on updating this little guy and making it more aesthetically pleasing and more user friendly, so check back regularly!  I'm revamping this as well as my TPT store, and can I just tell you that changing the name of your TPT is a

HUUUUUUUUUUUUUUUUUUUUGE

commitment.  You probably shouldn't ever do it.  Because it's pretty much life-consuming.  :)  But, once it's all done, I'll be glad I did!  You can find me in TPT here!
HUZZAH!  Until all of the changes take place, feel free to follow along on here and TPT so you can find it all again in a few short months!  Here's the end of another school year!

Absolute[ly] Value[able]

Was anyone else's week CRAZY last week?  I was directing our 6th Grade Egypt play last week, and then I realized I had a principal observation.  I'm a wierdo and love observations, but I was scrambling for something awesome to show off for math.  My curriculum map told me that Monday was Absolute Value, but all I thought was, "How the heck can I make this fun?"  I did a bit of Googling, Pinteresting, and blog-stalking until I found exactly what I wanted.  Dan Meyer is a serious genius, and I gleaned ideas from his two posts found here and here. (They're insanely awesome)

To kick it off, I had a PPT of 10 popular celebrities.  We went through a few people, each time the kids guessed how old the celebrity was.  We then discussed who the closest guesser was.  The huge emphasis had to be on distance from the right age - not the direction.  The best guesser may have been above or below.  That is critical for introducing absolute value.  It was so fun - my principal stood up and asked the kids to guess her age.  It was hilarious!  My kids were so nervous to guess too high!

I introduced what absolute value was, and then I had four stations set up to practice absolute value.
Cereal Weights - We weighed cereal, and students were given a goal weight.  We also had a margin of error of 2 grams, so if was within two grams of the goal weight, the cereal box was sellable!  This was a great time to discuss that in this case, the goal weight was acting as zero.  They loved it!  (Idea originally from here, but it's adapted a bit!)

Nerf Guns - A favorite in class.  We drew a target on the window in class, and then the kids shot suction-cup Nerf darts!  They measured the distance to the target.  Again, we talked about what is acting as zero.

Estimation Jar - Before class started, I had a little jar of jelly beans and had the kids estimate how many beans were inside.  (We definitely need to work on estimation in my class - they were SOOOOOOOO off!) This station, they calculated the best guesser again.  Again, we talked about what number is acting as zero.

QR Station - over the summer, I found great task cards on TPT by Felicia Watkins.  They can be found here!  I put my iPad over there, and the kids practiced in a more "structured" setting.  I'm not sure if my classroom is ever a totally structured math room in the traditional sense, but we actually accomplish a lot, and my students LOVE math!  I don't think I've heard a groan all year. That, my friends, is a serious accomplishment with 6th graders!